


How to Use a Laser Level to Level Ground
This guide explains how to use a laser level to level ground, measure elevation changes, and create proper slopes for outdoor construction projects.

Leveling ground accurately is a task that seems simple until you try to do it across more than a few feet. Small errors compound quickly, and a half-inch mistake near the house can turn into inches of slope by the time you reach the far edge of a patio.
Laser levels combined with a detector can streamline this process by creating a reference frame that provides accurate measurements anywhere on the job site. They are the standard tool for contractors and serious DIYers working with concrete, pavers, and drainage solutions.
What “Leveling Ground” Actually Means
Although leveling ground involves a flat surface, it may not always be horizontal. A laser level can help with several leveling project types.
- Flat surface: The entire area sits at the same elevation. This is common for slabs, sheds, and patios.
- Controlled slope: The ground drops at a consistent rate for drainage. This is common near foundations and walkways.
- Matched elevation: The ground aligns with an existing structure, sidewalk, or slab.
Practical Use Cases for Laser Ground Leveling
- Concrete slab preparation – ensures uniform thickness and proper curing behavior
- Paver patios and walkways – prevents uneven settling and tripping hazards
- Shed and gazebo bases – keeps structures square and doors aligned
- Driveway extensions – avoids dips that collect water
- Fence and retaining wall prep – keeps posts and blocks aligned vertically
- Landscape terraces – creates clean, stepped elevations
- Drainage correction projects – directs water away from foundations
The Right Laser Level for the Job
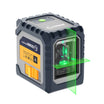
360-Degree Rotary Laser
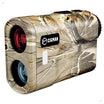
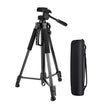
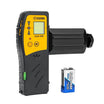
For large outdoor leveling projects, a 360-degree rotatory laser level coupled with a receiver is the ideal tool. The receiver clips onto a grade rod or measuring stick and beeps when it intersects with the horizontal plane projected by the level.
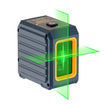
360-Degree Line Laser
For many residential projects, a high-quality 360-degree line laser is a more affordable choice that offers similar benefits to a rotary laser when paired with a compatible receiver. The pulse mode setting allows the receiver to detect the beam at a greater distance, extending the usable range well beyond what the eye can see.
Laser Level + Receiver: Why This Combination Works
The benefits of this combination include:
- One setup covers large areas without moving the laser.
- You can measure elevation anywhere within range, not just where you can see the beam.
- You get measurable height differences instead of visual guesses.
- The beam remains usable in bright sunlight.

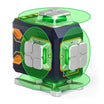
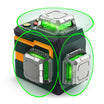
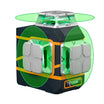
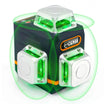
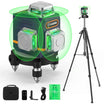
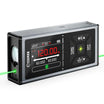
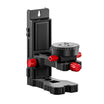
CIGMAN CM-S04 16 Lines Laser Level
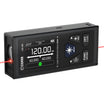
CIGMAN CM-S04 is designed to fully leverage the advantages of a laser level and receiver setup. Its 4×360° green laser layout delivers complete horizontal and vertical coverage, while Pulse Mode extends the working range up to 165 feet when used with a compatible receiver. With a full-color LCD display, Bluetooth app connectivity, and remote control, the CM-S04 offers precise, flexible control for demanding residential and jobsite applications.
Leveling Ground with a Laser Level
1. Prepare the area
Rough grade the area by removing vegetation, rocks, and obvious high spots. Laser leveling will allow you to refine the level after any initial excavation work.
2. Set your reference elevation
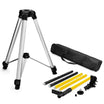
Set the laser level on a stable tripod placed on firm ground where it will not shift during the project. Hold the grade rod at your reference point and move the receiver until it signals level with the laser plane. Lock the receiver in place. This becomes your “zero” height.

3. Measure the site
Walk the area and take readings every few feet.
- If the receiver beeps above the plane, the ground is too high.
- If it beeps below the plane, the ground is too low.
Mark high and low areas with spray paint or flags.
4. Cut high spots
Use a shovel or rake to remove soil from high areas. Recheck with the receiver after removing material.
5. Fill low spots
Add soil or base material where the receiver shows low elevation. Spread evenly.
6. Compact as you go
Loose soil settles. Use a hand tamper or plate compactor to prevent future sinking.
7. Recheck frequently
After every major adjustment, scan the area again with the receiver.
8. Final verification
Walk the entire surface one last time to confirm all points read the same elevation.
Creating a Slope for Drainage
In many cases, flat ground can cause water to pool against structures. Fortunately, you can still use a laser level to make a slight slope for drainage. A common target is 1/8 to 1/4 inch per foot. Some laser levels have a slope function, creating an angled plane. However, you can create a similar effect by mounting your level on a tripod and tilting the device. Once you have adjusted the projected plane, you will follow the same steps as with a flat surface.
Common Mistakes to Avoid
Leveling ground requires consistent effort over a long period of time. Several problems can compromise the results of your project.
- Setting the tripod on loose soil that shifts during work
- Not defining a reference point clearly
- Changing the laser position mid-job without resetting the reference
- Skipping compaction, which leads to future settling
- Forgetting a spare battery, leading to project disruptions
- Relying on eyesight instead of receiver measurements
A Tool for Reliably Level Surfaces
A laser level with a receiver turns ground leveling from guesswork into a measurable process. Instead of relying on strings, boards, and repeated bubble level checks, you work from a single, stable reference plane. The result is flatter surfaces, better drainage, and fewer surprises after the project is finished. Whether you are preparing for concrete, landscaping, or structural work, a laser level pays for itself quickly in accuracy and consistency.
FAQs
Yes. A laser level creates a consistent reference plane that allows you to measure height differences across an entire area. When paired with a receiver, it provides accurate readings even in large outdoor spaces where the beam is not visible.
Ground levelness is checked by comparing multiple points to a single reference elevation. A laser level and receiver make this process efficient by showing whether each point is high, low, or level relative to the reference plane.
Most quality laser levels provide accuracy within a few millimeters over long distances. Accuracy depends on proper setup, stable tripod placement, and frequent verification during the leveling process.
Yes. A laser level can be adjusted to project a sloped plane, allowing you to maintain a consistent grade. This is commonly used to direct water away from foundations, patios, and walkways.
Visible range is limited outdoors, but working range increases significantly when using a receiver. Depending on the model, many laser levels can be used accurately at distances exceeding 150 feet.


